To mark the end of the first UK tour, of Billy Elliot, the musical, a "do it yourself" effort went ahead. (The whole project is entirely "amateur", with no connection with, or endorsement from, the show's "official" people.) (Project's main page.)
So! You can hope that "someone else" will do all the work, and a badge will fall into your hands. Or you can do a little bit of work, risk a little money and HELP... ensuring yourself a copy of a badge along the way!
It's easy, and not expensive... if you act SOON. (It would have been easier still if the manufacturer were able to accept orders from you for a re-supply of what I ordered... but they can't. Understandable, though, when you think about it. (You can re-order things you ordered previously.))
(If you want to create a badge similar to the one I've created, you are free to do so... and the instructions here will help you do it. By all means use my artwork as a starting point, if you wish. Details of that follow the notes on simply getting more copies of the current design.)
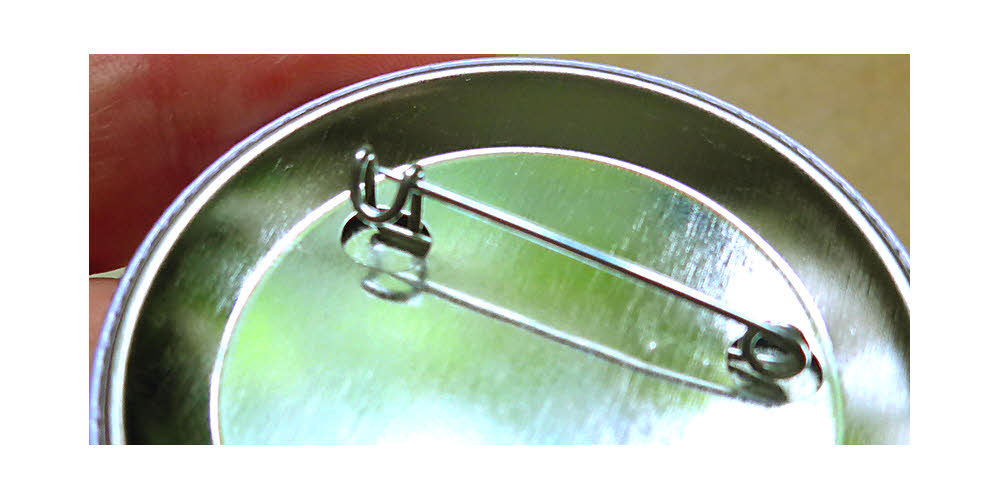
I liked the quality of the pin provided by AwesomeMerchandise.com (Details below... and no, I have nothing to do with them apart from being "happy customer".) Note also the "double metal discs" construction.
Of course, you don't HAVE to have any badges made! But if you want to CONTRIBUTE to the effort to celebrate the end of London/ First UK Tour, it isn't difficult, despite the number of words that follow. But you do have to Get Going Soon, because they can't be manufactured or shipped "instantly"... although for a small surcharge (£10), they can be produced quite quickly! A batch of 50 I requested late on 22 June was delivered 28 June, 15:30. (The artwork approval request was sent on the 25th, so the time between that an delivery was brief! And there was a weekend involved, across those dates.)
The first steps you can do "now". I expect the test batch of my final design any day now, i.e. before 4 July. I'd suggest you wait before placing your order until I'm able to confirm that the test batch came back looking as good as the test batch of an earlier design which HAS arrived, and was 100% satisfactory.
First: Fetch the artwork. If you are happy to "go with" my artwork, you only need to fetch "Finish-Button-17623-10-55.pdf". (The "Finish" in that filename comes from the cry of "Finish" which is part of the "curtain call cabaret". And "Button" is what some people call what I've been called "the badge".)
Click this to download Finish-Button-17623-10-55.pdfTHAT FILE... the one with the .pdf extension... is what I sent off to the badge maker to get the ones I'm expecting any day now. Send the same file, and you should get the same results! You might even benefit if you mention in the "note" box for the order "This is merely a repeat of one of your other customer's order SO114196 (23 July 2017) (with his permission!) if you want to save yourself the trouble of re-generating the artwork you need from the submitted file."
(If ever you want to re-order something you previously ordered from AwesomeMerchandise.com, there's a way to do that: Log in. Go to your Order history. Go to "Order details" for the thing you want to re-order. There's a button there for re-ordering.)
If the .pdf opens in your browser, because of how that is set up, instead of downloading... use the "download file" button on the .pdf viewer's toolbar to get the full, uncompressed file onto your hard disk. Don't save the version displayed on your browser. (The file should be about 55 kb.
(How to get the source file, for if you want to adapt the design, will be explained in a moment.)
Note that it isn't an "ordinary" .pdf. It was created "loss-less-ly" to give the badge makers the best possible starting point, within the limits of my design tools.
So. You have a copy of "Finish Button-17623-10-55.pdf" on your PC. (Depending on how your system is set up, you may not see the ".pdf", the "extension". If the file opens with Adobe Acrobat, all is probably well.)
Next you need an account with a badge maker. This was my first venture into making badges! More by luck than design, I settled on AwesomeMerchandise.com to make my badges for me. It has been a very good experience so far, and I'm now at the point where I'm just waiting for the second of two "trial run" orders to arrive. (The first arrived and was 100% satisfactory) (I should say that AwesomeMerchandise is in the UK, and I wanted my badges shipped to a UK address. If you are going to Hamburg from, say, Mongolia, maybe you want to get your badges made locally! Or take a chance on problems with customs clearance, and have your order shipped to your Hamburg hotel?)
Go along to the AwesomeMerchandise site... you can to this NOW... and "register". (It is all very simple and ordinary.)
Either now, or, if you want to be careful, after I've been able to post my "They came! They are great!" message, the next steps are as follows... (They are mostly *%$'ing "obvious", but there are one or two places you may welcome the comments in the following...)
Log into your account.
Do a search on "58mm badge"... that should lead to something like...
(The designs on the badges may, of course, change!)
I "went for" the simple one, the one on the left, the inexpensive one... the £12 would be cost of order of 10 badges... but 20 badges costs MUCH less than £24, fear not! (Only £16) (Prices as of June 2017... before tax, by the way... it is added on later in the process.) They include basic shipping to a UK address. The firm will ship worldwide. A typical detail: The firm asks you if the address you offer is residential... and adjust how they ship, depending on your answer. (I would guess they use Royal Mail to residential, and one of the independents to business, reflecting the different hassle levels of dealing with a "you were out" situation.)
Click on the image of the (basic) 58mm badges to proceed to the next page.
Tell them how many you want. Note how the price adjusts as soon as you go to the next box, where you tell AwesomeMerchandise "how many designs". (For a simple order for the Billy badges, you would be saying "1 design". (If, say, you were doing badges for a birthday party, and wanted different badges for the boys and for the girls, that's allowed, "2 designs". No extra charge. Just a little extra work: Make and upload two designs.))
Then you click "Add to Cart". Don't worry! You tell them what design you want, and how to ship LATER. You are NOT ordering a bunch of badges with the image on their SAMPLE badges!
Digression: If you are supplying your own artwork, not the file provided by the link further down this page, DO r-t-f-m. The badge manufacturers can't give you a good result without good- for their needs- artwork, and they go to great lengths to tell you what "works". On the other hand, they are also very accommodating. My badge was designed to avoid certain problem areas, which helped. For instance, if your badge has a photo of a human face on it, you will need to take extra care over the way colours vary from one screen to another, let alone from screen to ink-on-paper. AwesomeMerchandise.com will TRY to deal with files in any of the following formats:
File Format: PSD, AI, PDF, JPEG, TIFF, EPS
They request Colour Format: CMYK and File Resolution: 300dpi. ((End of digression!))
AwesomeMerchandise.com managed to deal with the file I sent them- and I've never done a badge before!
As I was saying... You click "Add to cart". A pop up invites you to proceed to "View cart and checkout." Don't worry... you can still change things.
At checkout, because I was doing what I've been writing about as I typed this, I found that they thought I wanted 40. (I'd clicked "20" twice, along the road to doing this.) No problem! Just revised to 20. That worked fine.
And there was another mystery: The cart said "Subtotal £32.40" (for 60 badges, 7/17), but also £10 for shipping. (Shipping is supposed to be free for orders to UK addresses. This was only because the system remembered that last time, I'd paid for the expedited service (£10 charge for promise of 5 working days between artwork approval and goods shipped.) Shipping for ordinary orders, to a UK address: FREE- but the charge for expediting goes on the bill as "shipping".
And, though of course it is a little worrying, leave the £10 there for now... you can take it off later.
Clicked "Checkout", which brought me to the page where I told it where to send the order. (The "how" to send option selections, including the "expedited" (or not) is on the next page. ("Delivery options", lower left- "Awesome FREE (ships within 8 days of artwork approval))" or "FAST" (delivery within 5 days of artwork approval.) (WORKING days, of course.))
This, a little unexpectedly, launched the "sign in" page... but that was because I hadn't signed in for a while, even though the pages I'd been on seemed to consider me signed in. I entered my eddress and password, and went right back to the place I'd been at in the ordering process.
And STILL it is okay that you haven't uploaded the artwork... that's still to come.
Click "Continue" again, and you arrive at the Payment page. (With a nice reminder at the top: "You will be prompted to upload artwork after checkout" (And a link to an explanation of why things work thus.)
Credit cards and Paypal accepted. (Or, if someone has been nice to you, you can use a gift certificate!)
(60, by the 8 day service, including tax, 03 Jul 17, came to £32.40)
When your credit card has been checked, you get a nice "Thank you for shopping with us!" message, and then you start the "upload artwork" process, by clicking a button for that. (But note your order number, which is now displayed, first. If you spot this in time. You'll get the information in an email, anyway. Don't hit your "back" button, just for the order number.)
The "upload" page suggests you download a template, look at tips. You really should have done this earlier, before you created the file with your artwork! You don't need to do it now, if you are confident that your artwork is okay. (The file I provide on this page has been okay previously... should still be okay!) Nor do you have to submit your artwork in a file derived from their template.
There's no TEXT button to start the upload process... just an icon (shown here). Click that.
It should open up a window that lets you navigate the folders on your system, get to the file you want to upload.
In my Windows 7/ Firefox case, the right button to click once the file was selected was "Open".
This... every time... gave rise to a slightly worrying request from my browser to "Resend", but that seemed to work fine.
Depending on your internet service, the actual upload will take more or less time. In my case, I saw "transferring"... on my status bar for about 20 seconds. (55kb file.)
When the upload finished, I was still on the "upload artwork" page... which makes sense. (I'll explain.)... but now there was an entry with the name of the file I'd uploaded, a chance (under it) to enter and save notes, and beside it, under "Artwork preview", a gray tile with, large letters "PDF" on it. (Previously that tile had a cross on it.)
The system is telling you, "Okay, we have that one uploaded. Sorry, can't give you a preview of that file format.
The "Upload artwork" icon is still present, in case you are doing a more-than-one design order.
Slightly disconcertingly, there's no "Okay/ Thanks/ Goodbye" button to click... but you ARE done, and can just close the page. Not "immediately", but, during working hours, you should get an email from "info@awesome..." subject "Your order no.xxx has been approved"
Subsequently, when someone has had time to covert what you submitted to what their printing machines require, you'll get another email. This will come from a named person, with "(Awesome..." following the name, and "*APPROVAL NEEDED*...." as the subject line. Keep an eye out for this email! You need to check the results of their work, and TELL THEM YOU ARE HAPPY before manufacture can start! (Fair enough! Just be watching for that "is this okay?" enquiry, if you are in a hurry for your badges!
And there you have it! I have already placed and had back two expedited orders, and all went entirely to plan. I hope you have equally satisfactory experiences. AwesomeMerchandising made what is actually far from trivial very easy... for me. They more than earned the reasonable prices they charged, I thought.
If you ARE stuck over something, the firm gives you a telephone number, for if you really need it! And they were pleasant to deal with in several exchanges by several channels.
Artwork: They are capable of/ willing to extract the "obvious" circle of artwork out of the middle of a rectangular page.
Don't expect miracles. If you put a thin-line circle around the outside of your design, hoping that it will occupy the 0.5mm closest to the edge of the face of the badge, I think you are expecting too much. I had a plain border around my artwork, to "wrap" around the edge of the face of the badge, tolerant of slight misalignments.
That's it! You only do the above, then sit back, and soon finished badges arrive!
If you want to adapt my design, you are free to do so. Or create your own, from scratch....
I created my design using the word processor module of Open Office. (aka LibreOffice). Not the ideal design tool for this task... but one I could make do what I wanted.
The following is the Open Office/ Libre Office word processor file I used....
Click this to download Finish-Button-17623-10-55-SOURCE.odtTHAT FILE... the one with the .ods extension, and "SOURCE" in the name... is what I created the file I sent off FROM. (If you are happy with my design, you don't need the "SOURCE" file.)
Load the .ods file into your computer. Tweak. Once you have the design as you want it, if you are creating it as I did, you export it to .pdf.... be sure, in the "PDF Options" dialogue, in the "Images" section, to choose the "loss-less compression" option.
Then you just proceed to order the badges as described at the top of the page.
Thank you, if for nothing else, reading down to here. I hope you got whatever you came for? By all means contact me if you'd like something clarified.
To contact this page's author, Tom Boyd via...

You'll have to copy the eddress above by hand. It is a graphic, to make things difficult for spam engines. Please start the subject line of any emails with "BB", for "Billy Badge".
Be sure to keep an eye on your spam folder for a few days, if you write to me. Simply because of the yahoo.co.uk domain, many spam filters assume that a reply from me is just spam.
This page was just to explain how to get one of the badges made. Other pages can be accessed from the index page for the July 2017 Billy Elliot Memento badge. (The whole project is entirely "amateur", with no connection with, or endorsement from, the show's "official" people.)
![]() Page tested for compliance with INDUSTRY (not MS-only) standards, using the free, publicly accessible validator at validator.w3.org. Mostly passes. There were two "unknown attributes" in Google+ button code, two further "wrong" things in the Google Translate code, and similar in Flattr code. Sigh.
Page tested for compliance with INDUSTRY (not MS-only) standards, using the free, publicly accessible validator at validator.w3.org. Mostly passes. There were two "unknown attributes" in Google+ button code, two further "wrong" things in the Google Translate code, and similar in Flattr code. Sigh.